
Overview
Once a process starts marking leads as Interested, you’ll often want to pull that list out of Uservox — for a sales handoff, a follow-up campaign, or reporting. This page covers filtering the leads list down to Interested leads and exporting the result to CSV.Step 1: Filter Leads by Interested State
- Open Leads from the top navigation.
- Click inside the search bar (“Start typing text or choose a filter…”).
- Add a rule: select State as the field, set the condition to equals, and choose Interested as the value.
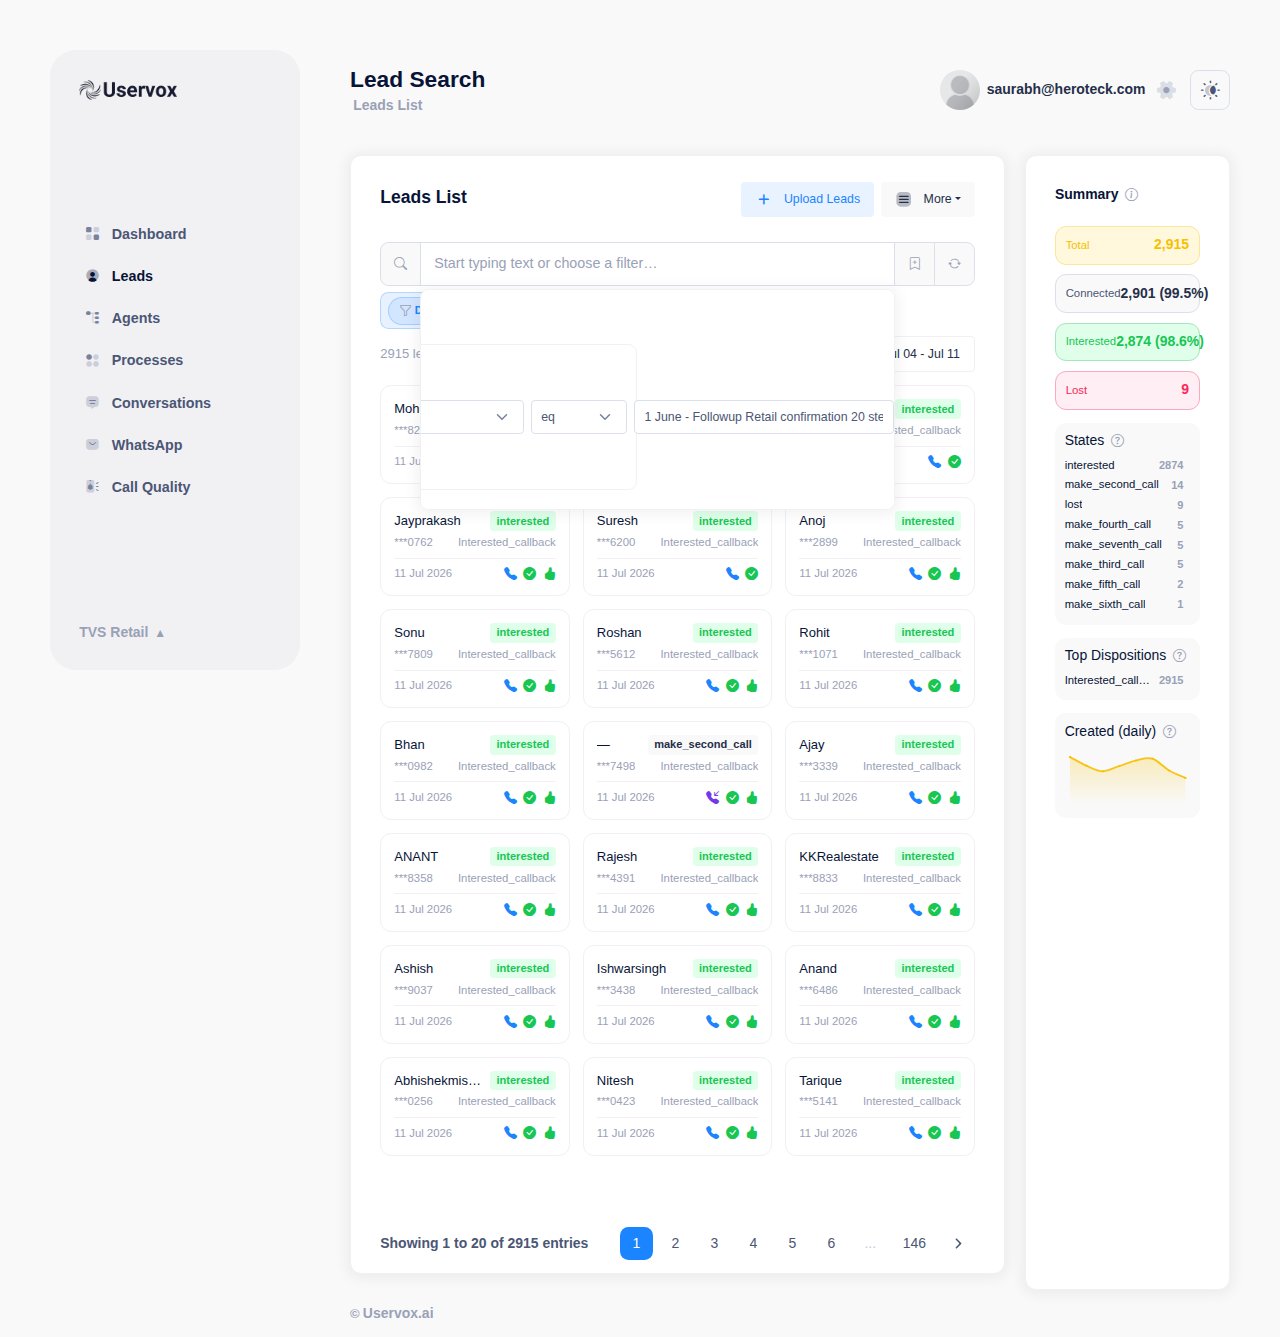
Step 2: Open Export CSV
With the filter applied, click More in the top-right of the Leads List, then select Export CSV.
Step 3: Configure the Export
The Export Leads to CSV dialog shows the filters that will be applied to the export and lets you customize what’s included: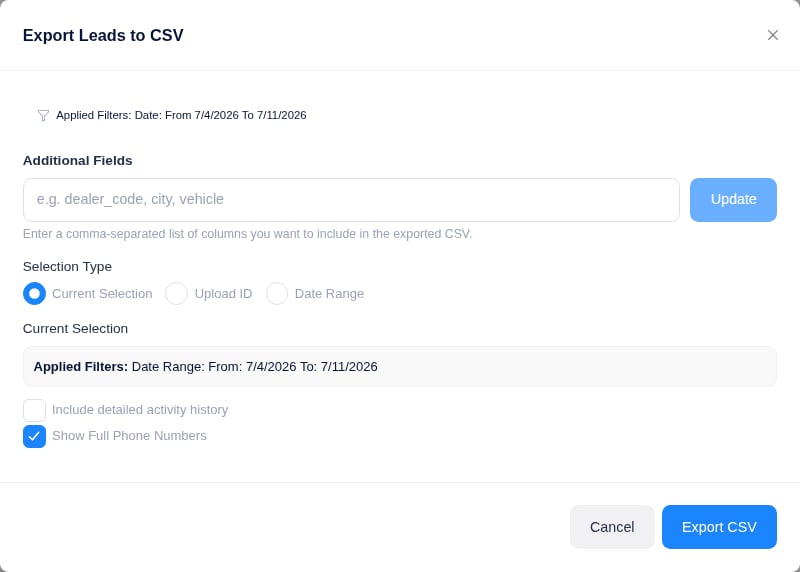
- Applied Filters — a read-only summary of the filters currently active on the leads list (your Interested-state filter, plus any date range).
- Additional Fields — a comma-separated list of extra columns to include, e.g.
dealer_code, city, vehicle. Click Update after entering fields to refresh the preview. - Selection Type — choose what the export covers:
- Current Selection — leads matching your active filters (the default, and what you want for an Interested-only export).
- Upload ID — all leads from a specific upload batch.
- Date Range — leads within a date range, independent of other filters.
- Include detailed activity history — adds the full activity/attempt log per lead. Leave this off for a simple contact list; turn it on if you need call-by-call detail.
- Show Full Phone Numbers — checked by default. Uncheck this if the CSV is going somewhere that shouldn’t see unmasked phone numbers.
Step 4: Retrieve the File
Depending on the size of the result set, the export either downloads directly or runs as a background job. For larger exports, check More → View Bulk Jobs to track progress and download the finished file once it’s ready.Frequently Asked Questions
Does the export respect my current filters, or does it export all leads?
Does the export respect my current filters, or does it export all leads?
It exports based on the Selection Type you choose in the dialog. With Current Selection (the default), only leads matching your active filters — including the Interested-state filter — are included.
Can I export leads across multiple processes at once?
Can I export leads across multiple processes at once?
Yes. The State filter applies across all processes in the project. If you only want leads from one specific process, add a Process ID rule alongside the State filter.
What's the difference between State and Disposition when filtering for Interested leads?
What's the difference between State and Disposition when filtering for Interested leads?
State reflects the lead’s current position in the process (e.g.
interested), while Disposition reflects the specific outcome recorded on the last call attempt (e.g. Interested_callback), which can vary by process. Use State for a broad Interested-leads view; use Disposition when you need a specific outcome.