1. Adding an Agent to the Process
Each process begins by assigning a Voice Agent.The agent defines the voice, script, and logic that will be used for every call in this process. Steps:
-
Go to Processes → Duplicate Existing Process.
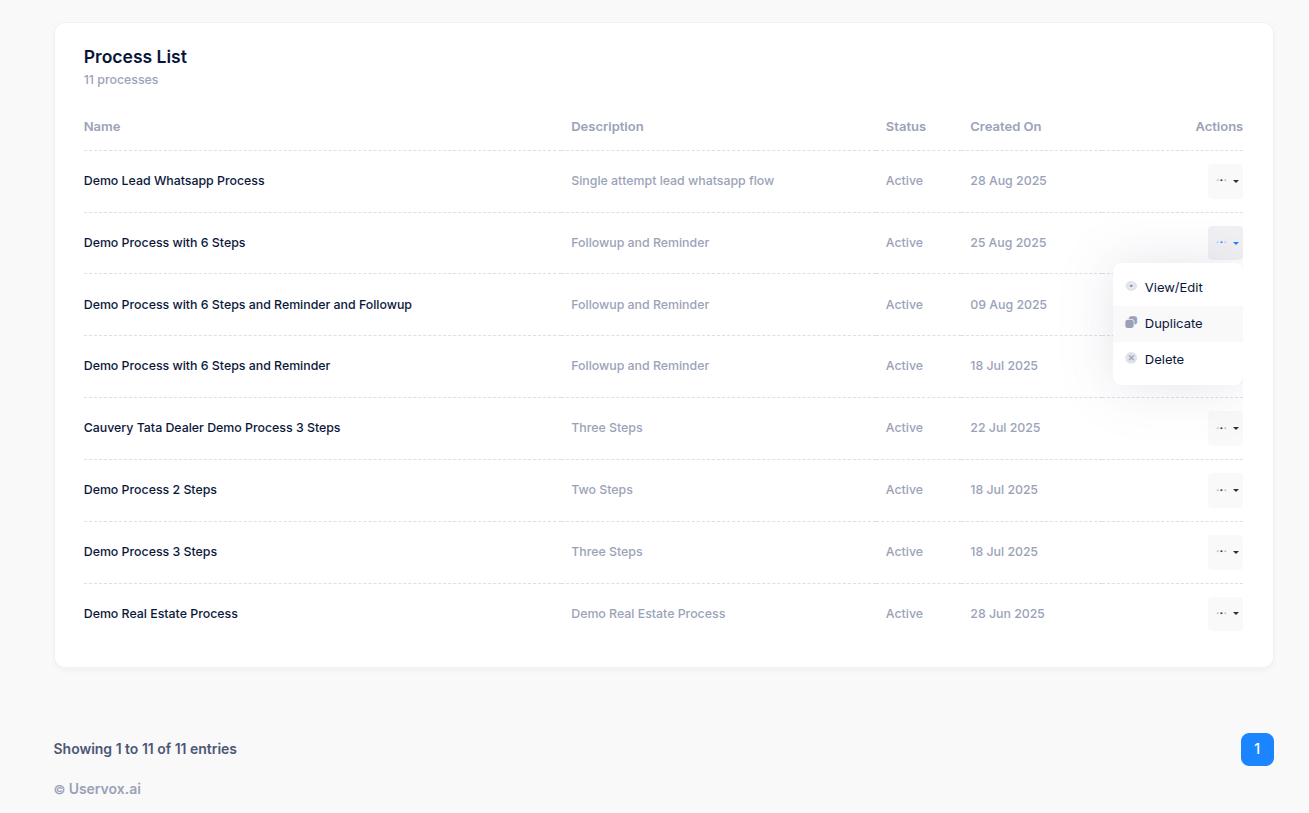
- Enter a process name and description.
-
Under Agent, select the desired voice agent from the dropdown.
(Example: Process 4 steps, Process 6 steps, etc depending on your campaign.)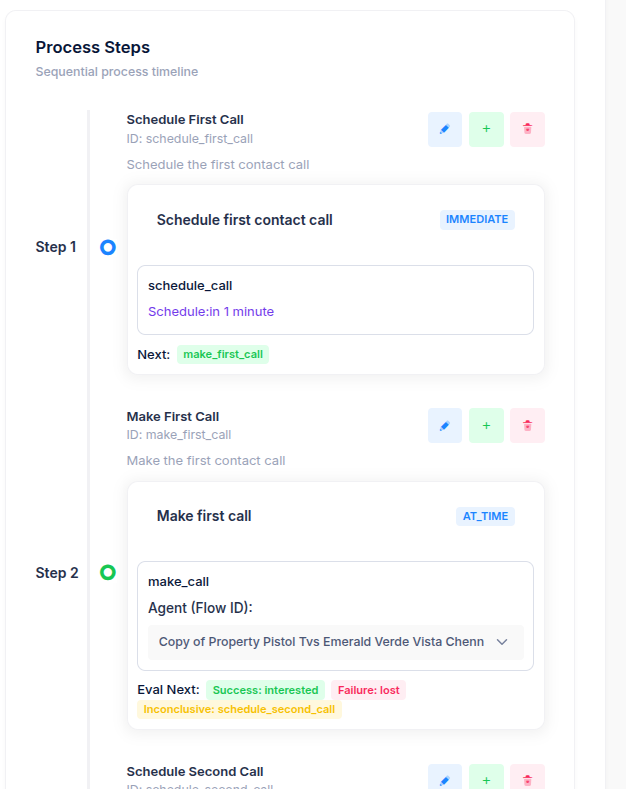
💡 Tip: Use different agents for different workflows — e.g., loan follow-ups, lead verification, or renewal reminders.
2. Scheduling Calls
UserVox gives you flexibility to schedule follow-up calls in two ways:- Using Calling Windows, or
- Using AI Instructions (based on what the customer says).
a. Scheduling with Calling Windows
Calling windows define when a call can be placed — for example, only during business hours. Example:- Call Type:
second_contact - Window:
Next available window
(Refer to Screenshot 1)
| Disposition | Window |
|---|---|
| Working with Competitor | Next Week |
| No Reason Shared | 2 Weeks Later |
- Under Action, select Schedule Call.
- Choose a
callTypesuch asfirst_contact,second_contact, orfollow_up. - Set the window (e.g., “Next available window”).
- Under windowOnDisposition, define follow-up timings based on specific dispositions.
- Example: “Working with Competitor → Next Week.”
- Example: “No Reason Shared → 2 Weeks Later.”
- Click Add to include additional disposition rules.
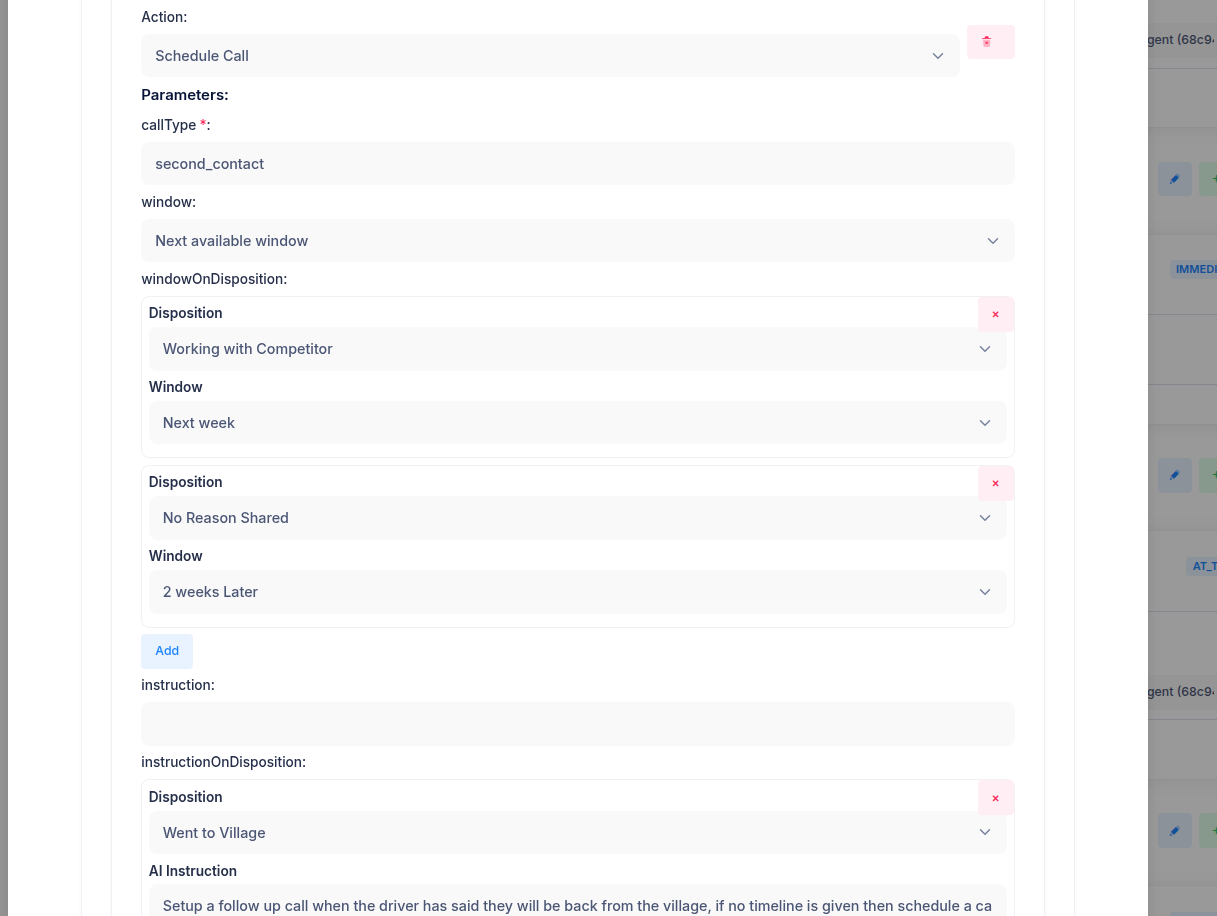
b. Scheduling Using Instructions
When you want the AI to schedule follow-ups dynamically based on what the user says — for example, “I’ll be back from my village next week” — use AI Instructions.(Refer to Screenshot 1 — bottom section) Steps:
- Under instructionOnDisposition, select a disposition (e.g., Went to Village).
-
Add a natural-language instruction such as:
“Setup a follow-up call when the driver has said they will be back from the village; if no timeline is given, then schedule a call after 7 days.”
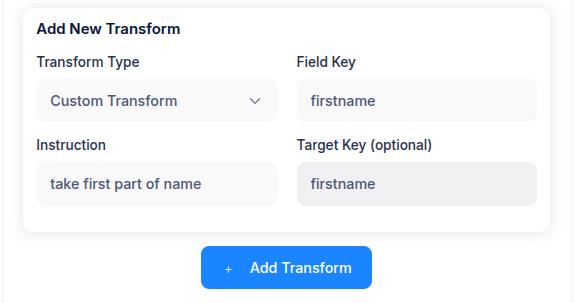
3. Adding Transformations
Transformations help you clean, adjust, or rename input fields before sending them to the voice agent.(Refer to Screenshot 3) Example Use Case:
If your incoming data includes full names but your agent script only needs the first name. Steps:
- Click Add Transform.
- Choose the Transform Type (e.g., Custom Transform).
- Enter the Field Key — e.g.,
firstname. - Add an Instruction — e.g., “take first part of name”.
- Optionally, specify a Target Key (output field).
- Click Add Transform to save.
4. Setting Dispositions
Dispositions capture the outcome of each call and trigger what happens next.(Refer to Screenshot 2) Each disposition can be tagged as:
- Success (e.g., SiteVisitPlanned, Hot)
- Failure (e.g., InvalidNumber, NotInterested)
- Neutral (e.g., CallBackLater, Attempted)
- Navigate to the Dispositions tab in your process.
- Click Add New Disposition.
- Enter a Name, select a Type, and write a Prompt that defines when this status should be used.
- Save the disposition.
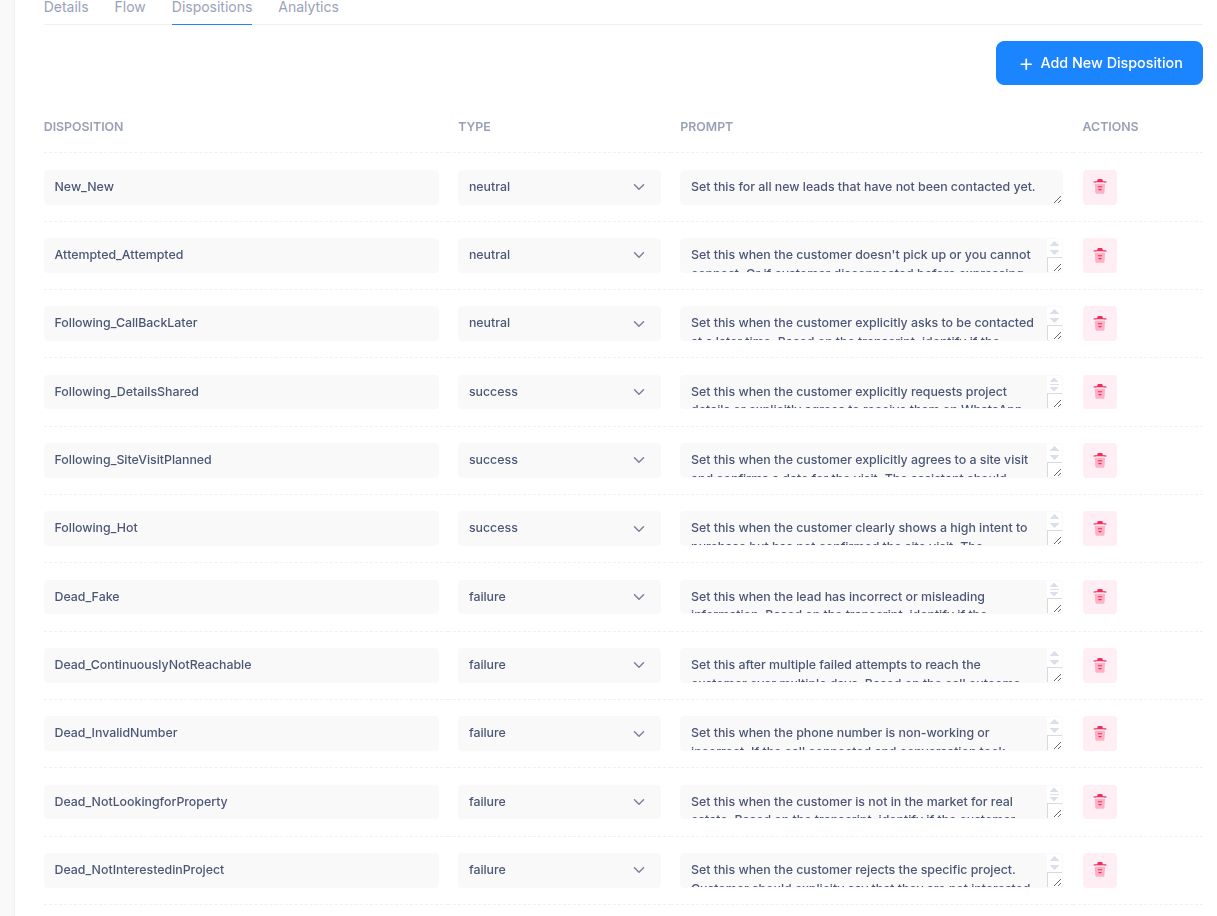
📊 Dispositions feed into reporting and re-calling logic — so make sure each scenario (success, failure, neutral) is well-defined.
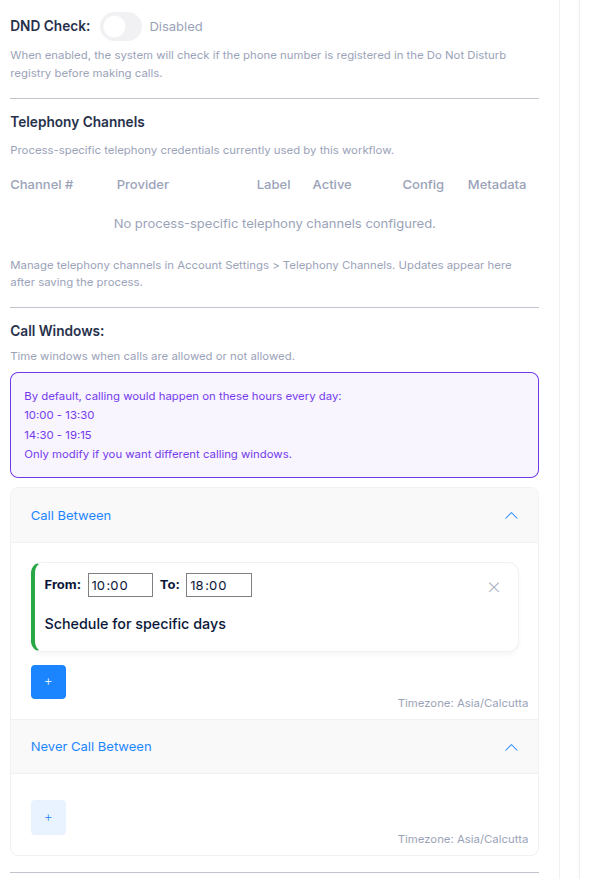
5. Defining Calling Windows
To ensure compliance and optimize reach rates, define calling windows (the time periods when calls are allowed). Steps:- Go to Calling Windows section.
- Set preferred start and end times (e.g., 10:00 AM – 7:00 PM).
- Choose active days (e.g., Monday to Saturday).
- Optionally, assign specific windows to follow-ups or retries.tempt calls intelligently.