1. Creating a New Agent
To start building an agent:- Go to Agents in the left menu.
- Click “Duplicate an existing Agent.”

- Enter the Agent Name and Description.
- Click Save — this opens the agent’s configuration dashboard.
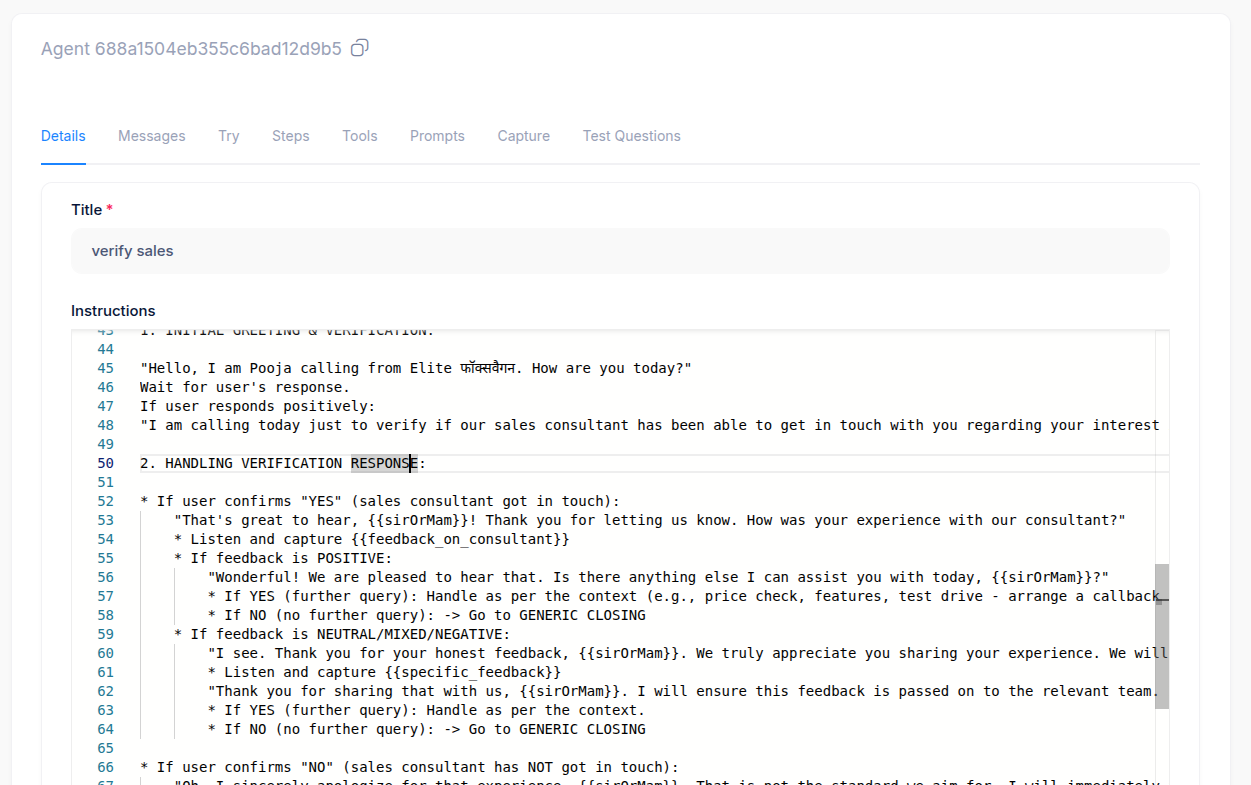
2. Adding the Prompt (Agent Guideline)
Navigate to the Details tab to define the agent’s Prompt — the set of conversation rules or scripts that guide how your AI speaks. Purpose:This is where you write who the agent is, what it should say, and how it should respond. Example:
- Greeting
- Verification
- Follow-up Questions
- Closing
{{sirOrMam}}, {{city}}, or {{hindi_model}} for dynamic personalization.
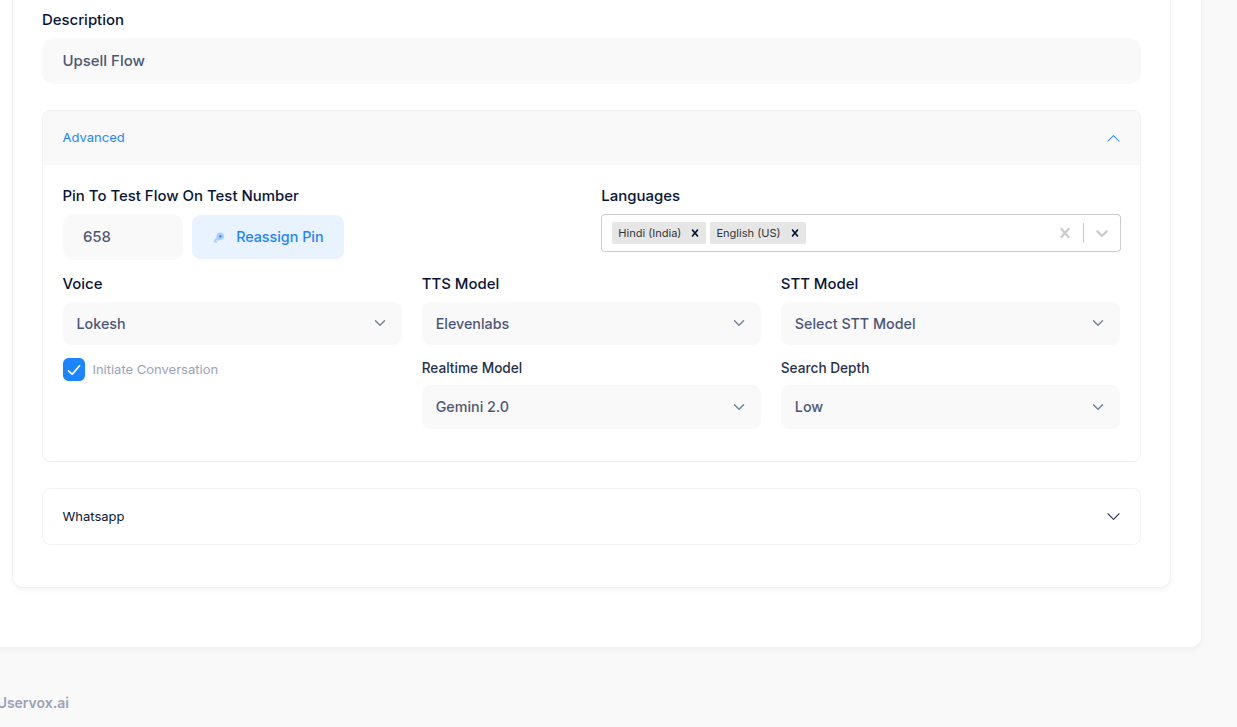
3. Choosing LLM, TTS, and STT Models
Go to the Advanced Settings section to set up the agent’s voice and language model configurations. You can select:| Setting | Description | Example |
|---|---|---|
| Realtime Model (LLM) | The AI brain that processes logic and responses | Gemini 2.0 |
| TTS Model (Text-to-Speech) | Converts text into natural-sounding voice | ElevenLabs |
| STT Model (Speech-to-Text) | Converts user’s speech into text | Select from dropdown |
| Voice | Choose a preferred tone or voice profile | Lokesh |
| Languages | Add multiple supported languages | Hindi (India), English (US) |
- Assign a PIN to test on a phone number
- Enable Initiate Conversation for outbound tests
- Adjust Search Depth for response variability
4. Adding Agent Tools (Function Calls)
Tools allow your AI agent to fetch data from APIs or perform external actions — like checking a model price or scheduling a test drive.- Go to the Tools tab in your agent.
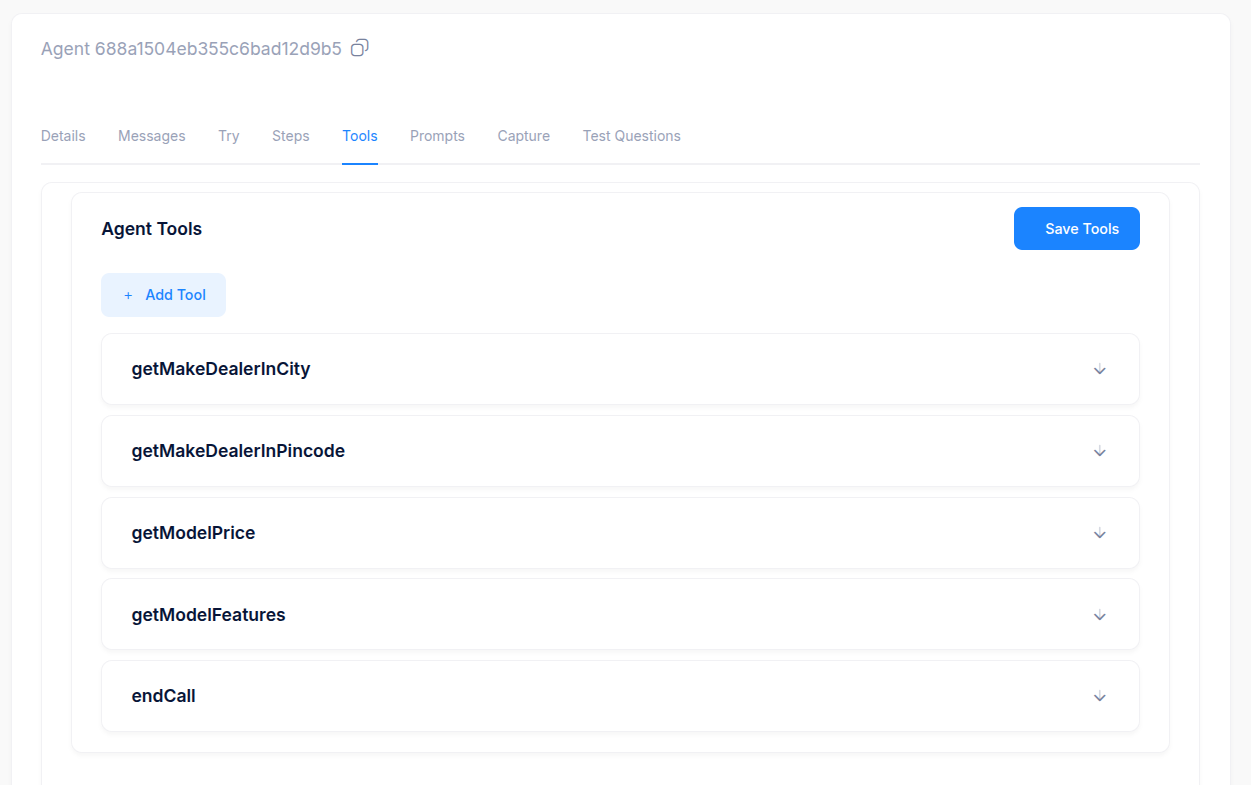
- Click Add Tool.
- Enter a Tool Description (e.g., Get model price by name).
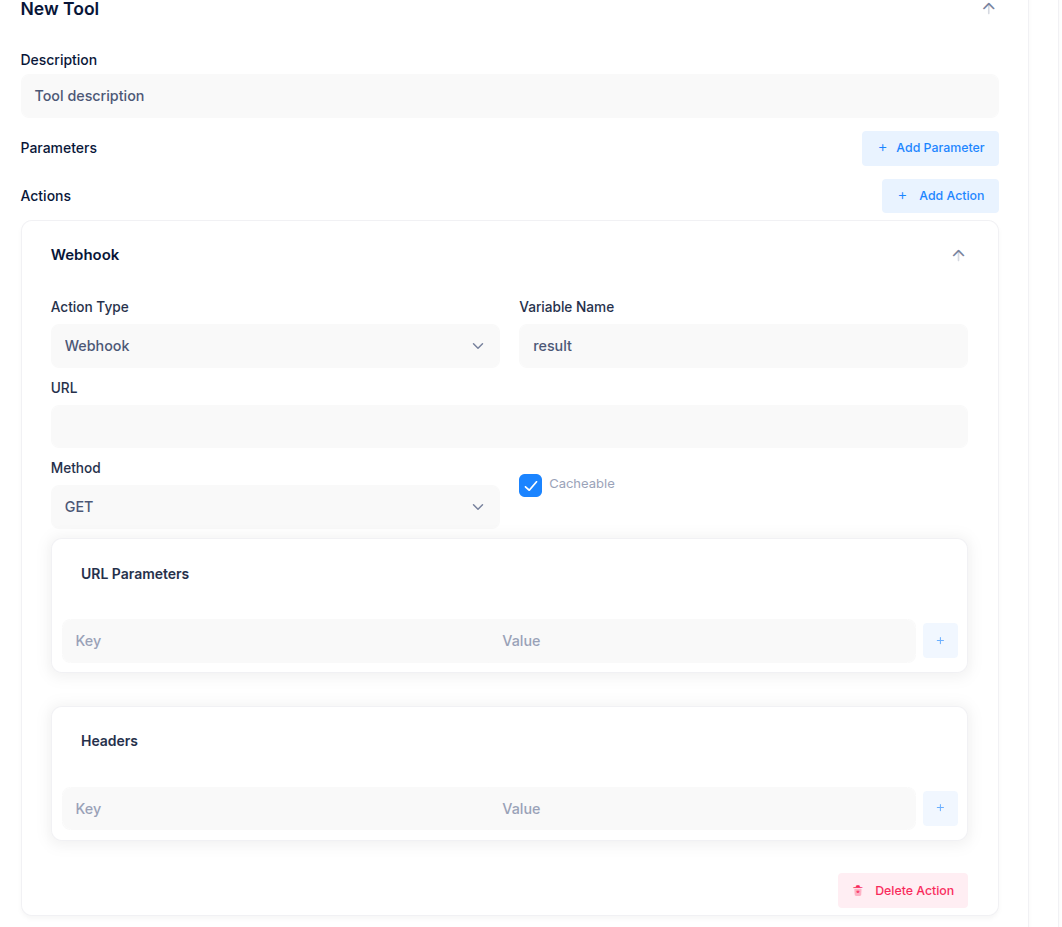
- Click + Add Parameter if your API requires input values (like
cityormodel). - Under Actions, click + Add Action, then configure the webhook:
- Action Type: Select
Webhook. - Variable Name: Choose where the API response should be stored (e.g.,
result). - URL: Paste the full API endpoint (e.g.,
https://api.elitevw.in/getModelPrice). - Method: Choose
GETorPOST. - Cacheable: Enable if the response doesn’t change frequently.
- Add any URL Parameters and Headers required by your API.
- Action Type: Select
- Click Save Tool to finish.
Example
| Setting | Example Value |
|---|---|
| Description | Get dealer by city |
| URL | https://api.elitevw.in/getMakeDealerInCity |
| Method | GET |
| URL Parameter | city = {{city}} |
| Variable Name | dealerList |
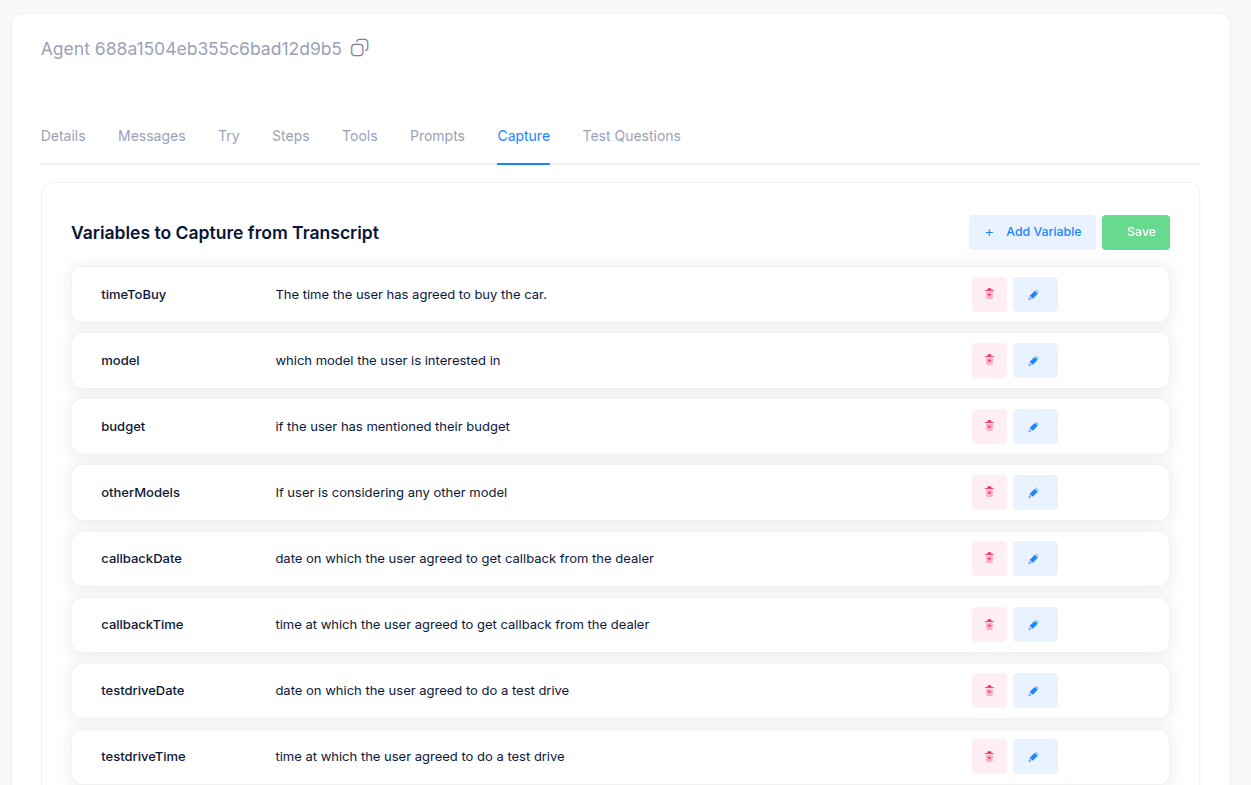
5. Capturing Variables from Conversations
In the Capture tab, you can define structured data points that the AI automatically extracts from the user’s speech or responses. Examples of captured variables:| Variable | Purpose |
|---|---|
timeToBuy | When the user plans to make a purchase |
model | Car model user is interested in |
budget | Mentioned price range |
callbackDate | Date for follow-up call |
testdriveTime | Scheduled time for test drive |
- Click Add Variable.
- Give it a name and a short description.
- Click Save.
6. Using Lead Metadata
You can personalize the conversation using metadata associated with the lead. Example: If you have inserted a lead with the following structure:“User is interested in and of a car.”The agent will dynamically replace these variables with “Tata” and “Harrier” during the call.
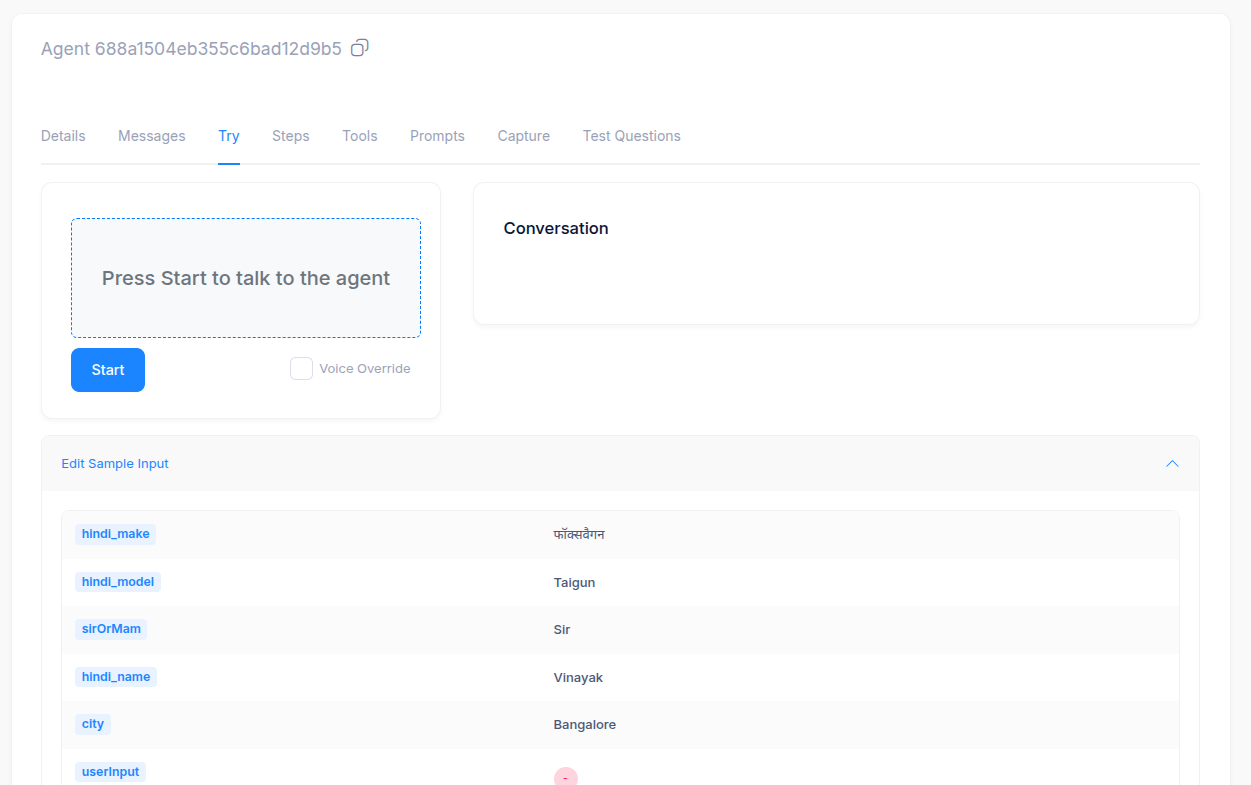
7. Trying the Agent in the Simulator
In the Try tab, you can test how your agent performs before deployment. Steps:- Click Start to begin the simulated call.
- Optionally enable Voice Override to test custom speech.
- Review the conversation flow in the Conversation Window.
- Adjust Sample Input Variables (like name, city, model, make) to test different cases.
hindi_make: फॉक्सवैगनhindi_model: TaigunsirOrMam: Sircity: Bangalorehindi_name: Vinayak
8. Editing and Updating Agents
Once your agent is live, you can revisit any tab to make changes:- Refine prompt logic or tone.
- Update TTS, STT, or LLM settings.
- Add new captured variables or tools.
- Rerun tests using the Try simulator.