> ## Documentation Index
> Fetch the complete documentation index at: https://docs.uservox.ai/llms.txt
> Use this file to discover all available pages before exploring further.
# How to Simulate a Voice Agent and Test Different Conversation Scenarios Using Variables
## Overview
Uservox provides a built-in simulation environment that allows you to test your voice agents before deploying them to production. The simulation feature helps you:
* Validate conversation flows
* Test prompt behavior
* Verify variable handling
* Simulate different customer scenarios
* Debug agent responses
* Test edge cases without making live calls
***
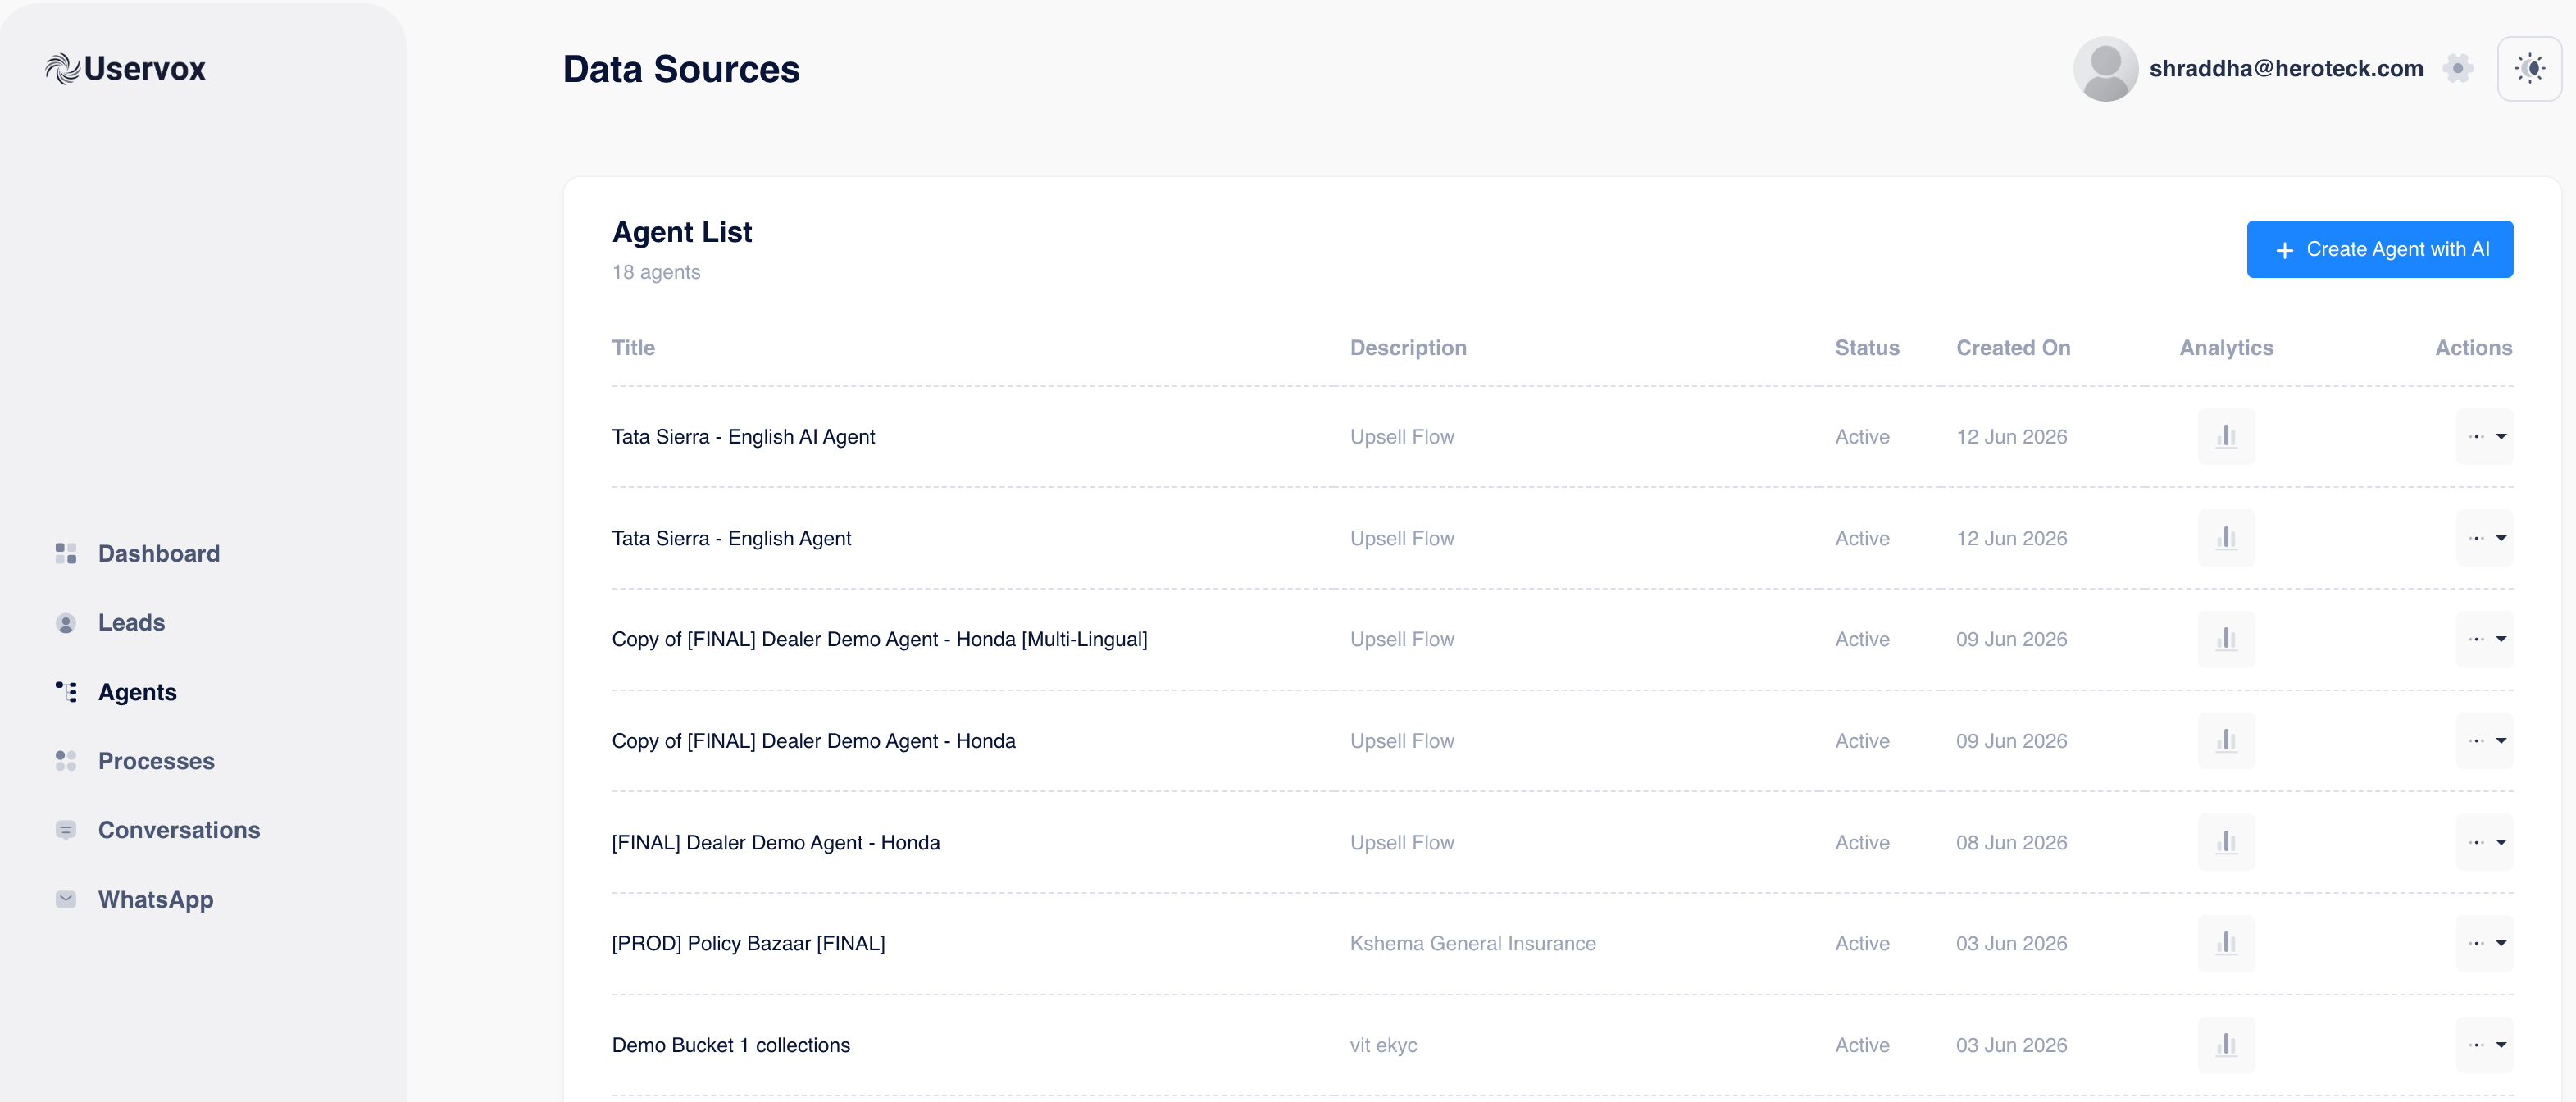
# Step 1: Navigate to the Agent
1. Login to Uservox.
2. Click **Agents** from the left navigation menu.
3. Select the agent you want to test.
You will see the Agent Details page.
 ***
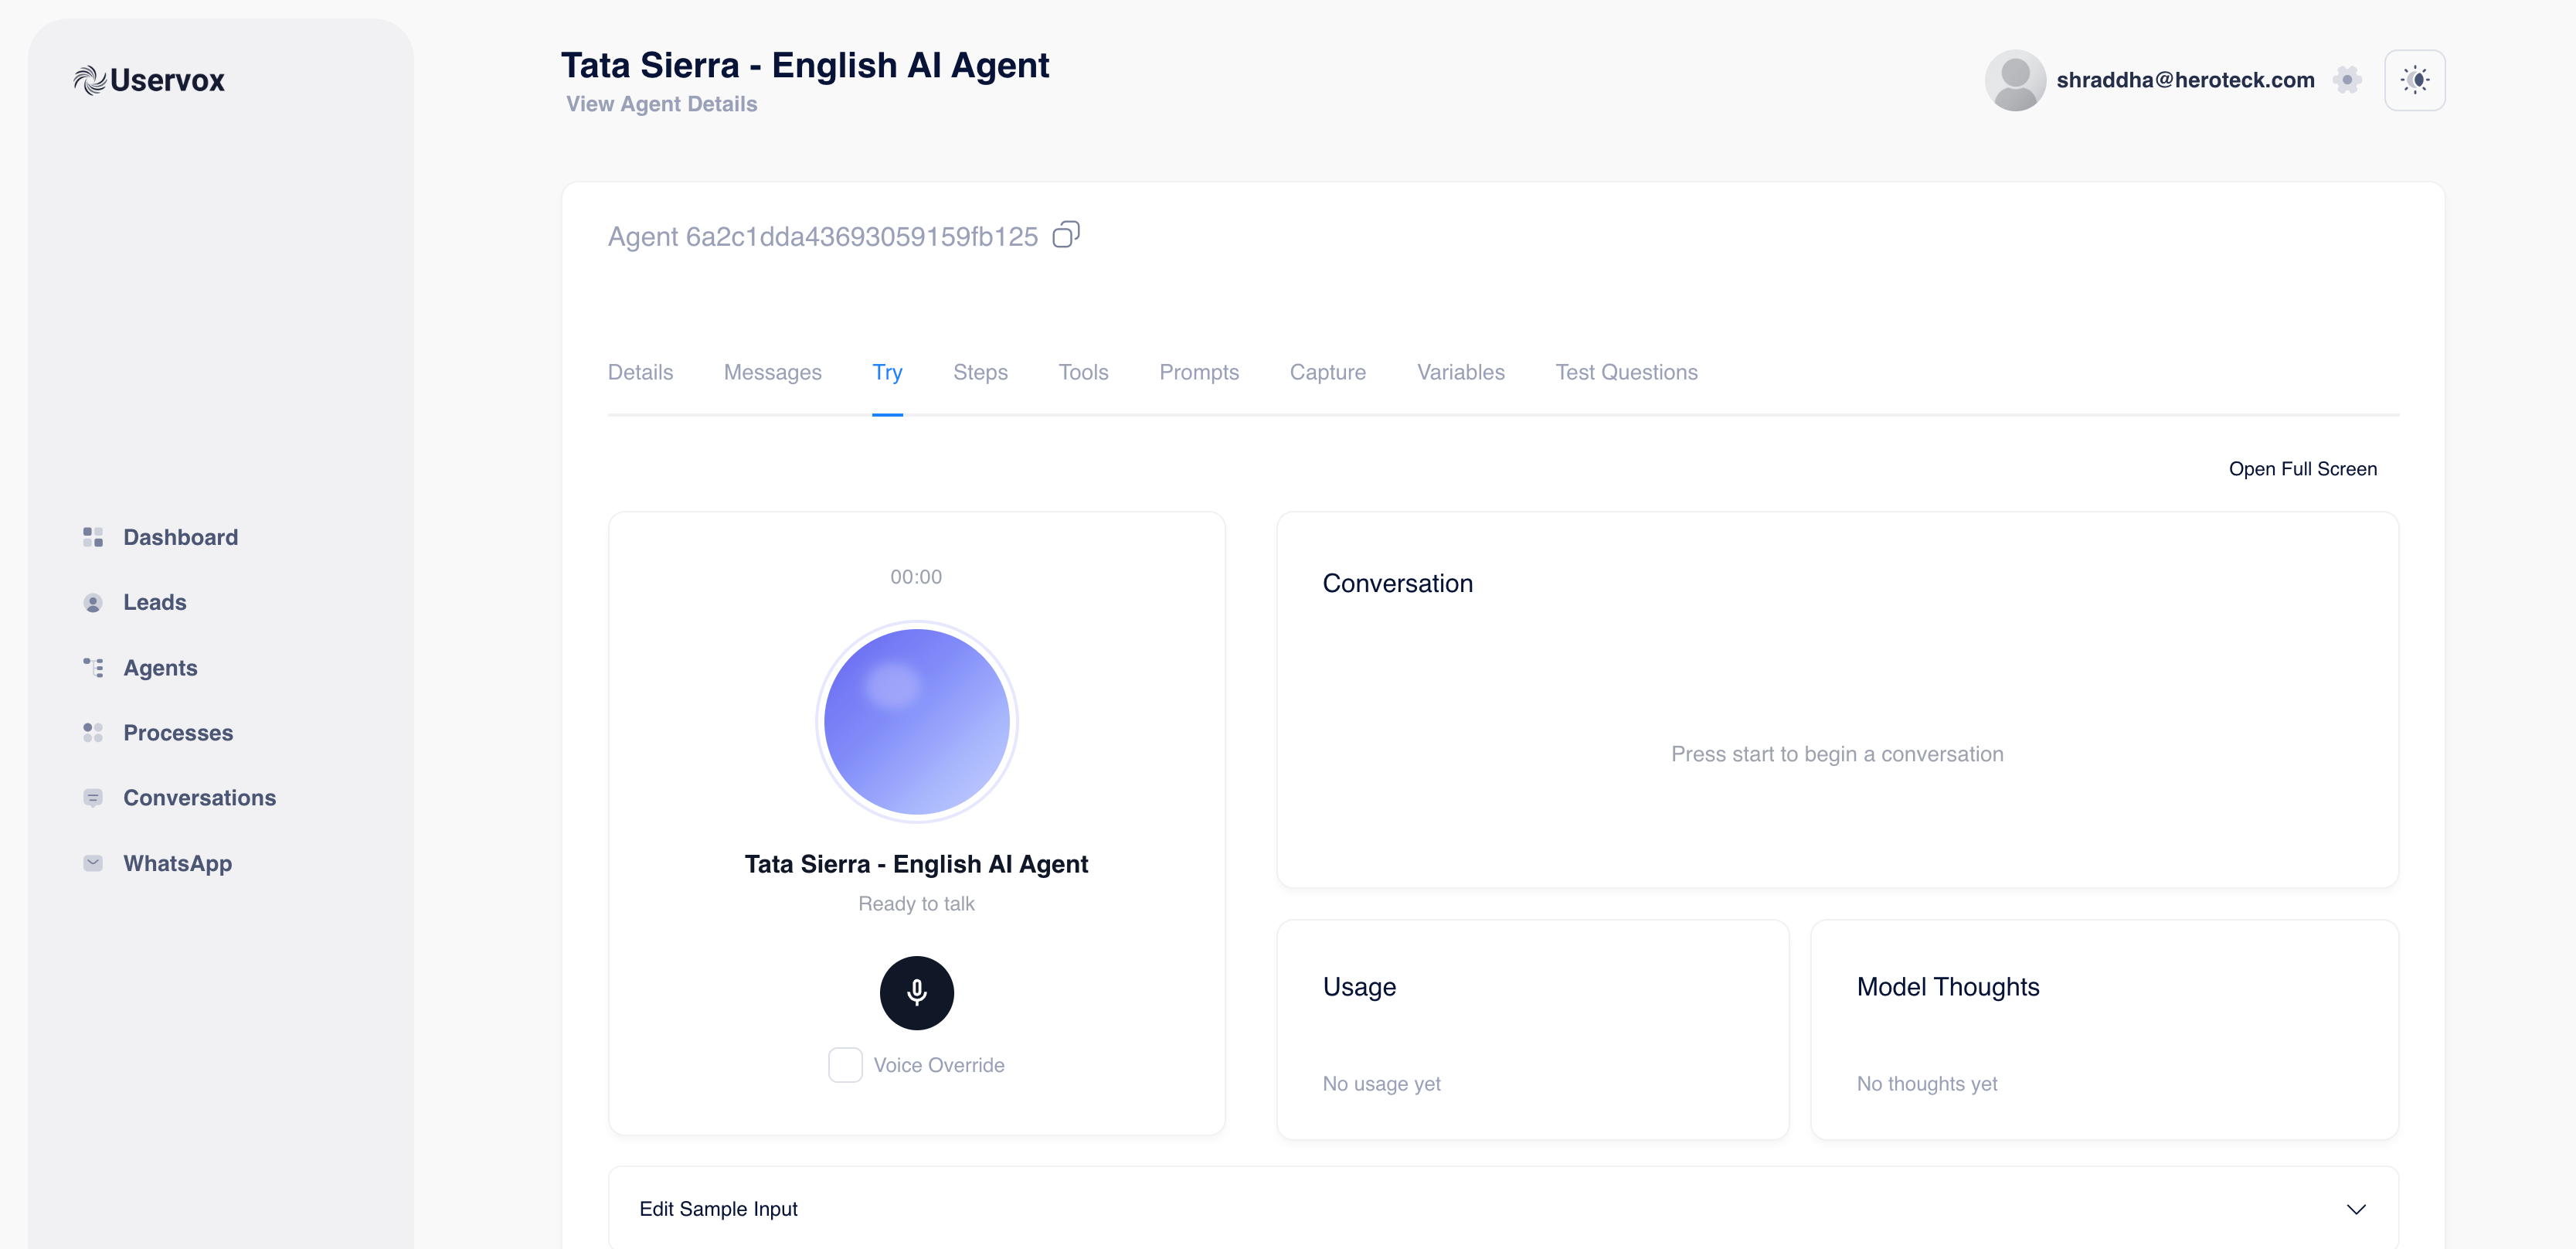
# Step 2: Open the Simulation Screen
Inside the Agent Details page:
1. Click on the **Try** tab.
2. The simulation screen will open.
The Try screen contains:
### Voice Interface
* Start conversation button
* Voice testing environment
* Voice override option
### Conversation Panel
* Displays the complete conversation between the user and the agent in real-time.
### Usage Panel
* Shows token and model usage.
### Model Thoughts Panel
* Displays reasoning and internal execution details (if enabled).
***
# Step 2: Open the Simulation Screen
Inside the Agent Details page:
1. Click on the **Try** tab.
2. The simulation screen will open.
The Try screen contains:
### Voice Interface
* Start conversation button
* Voice testing environment
* Voice override option
### Conversation Panel
* Displays the complete conversation between the user and the agent in real-time.
### Usage Panel
* Shows token and model usage.
### Model Thoughts Panel
* Displays reasoning and internal execution details (if enabled).
 ***
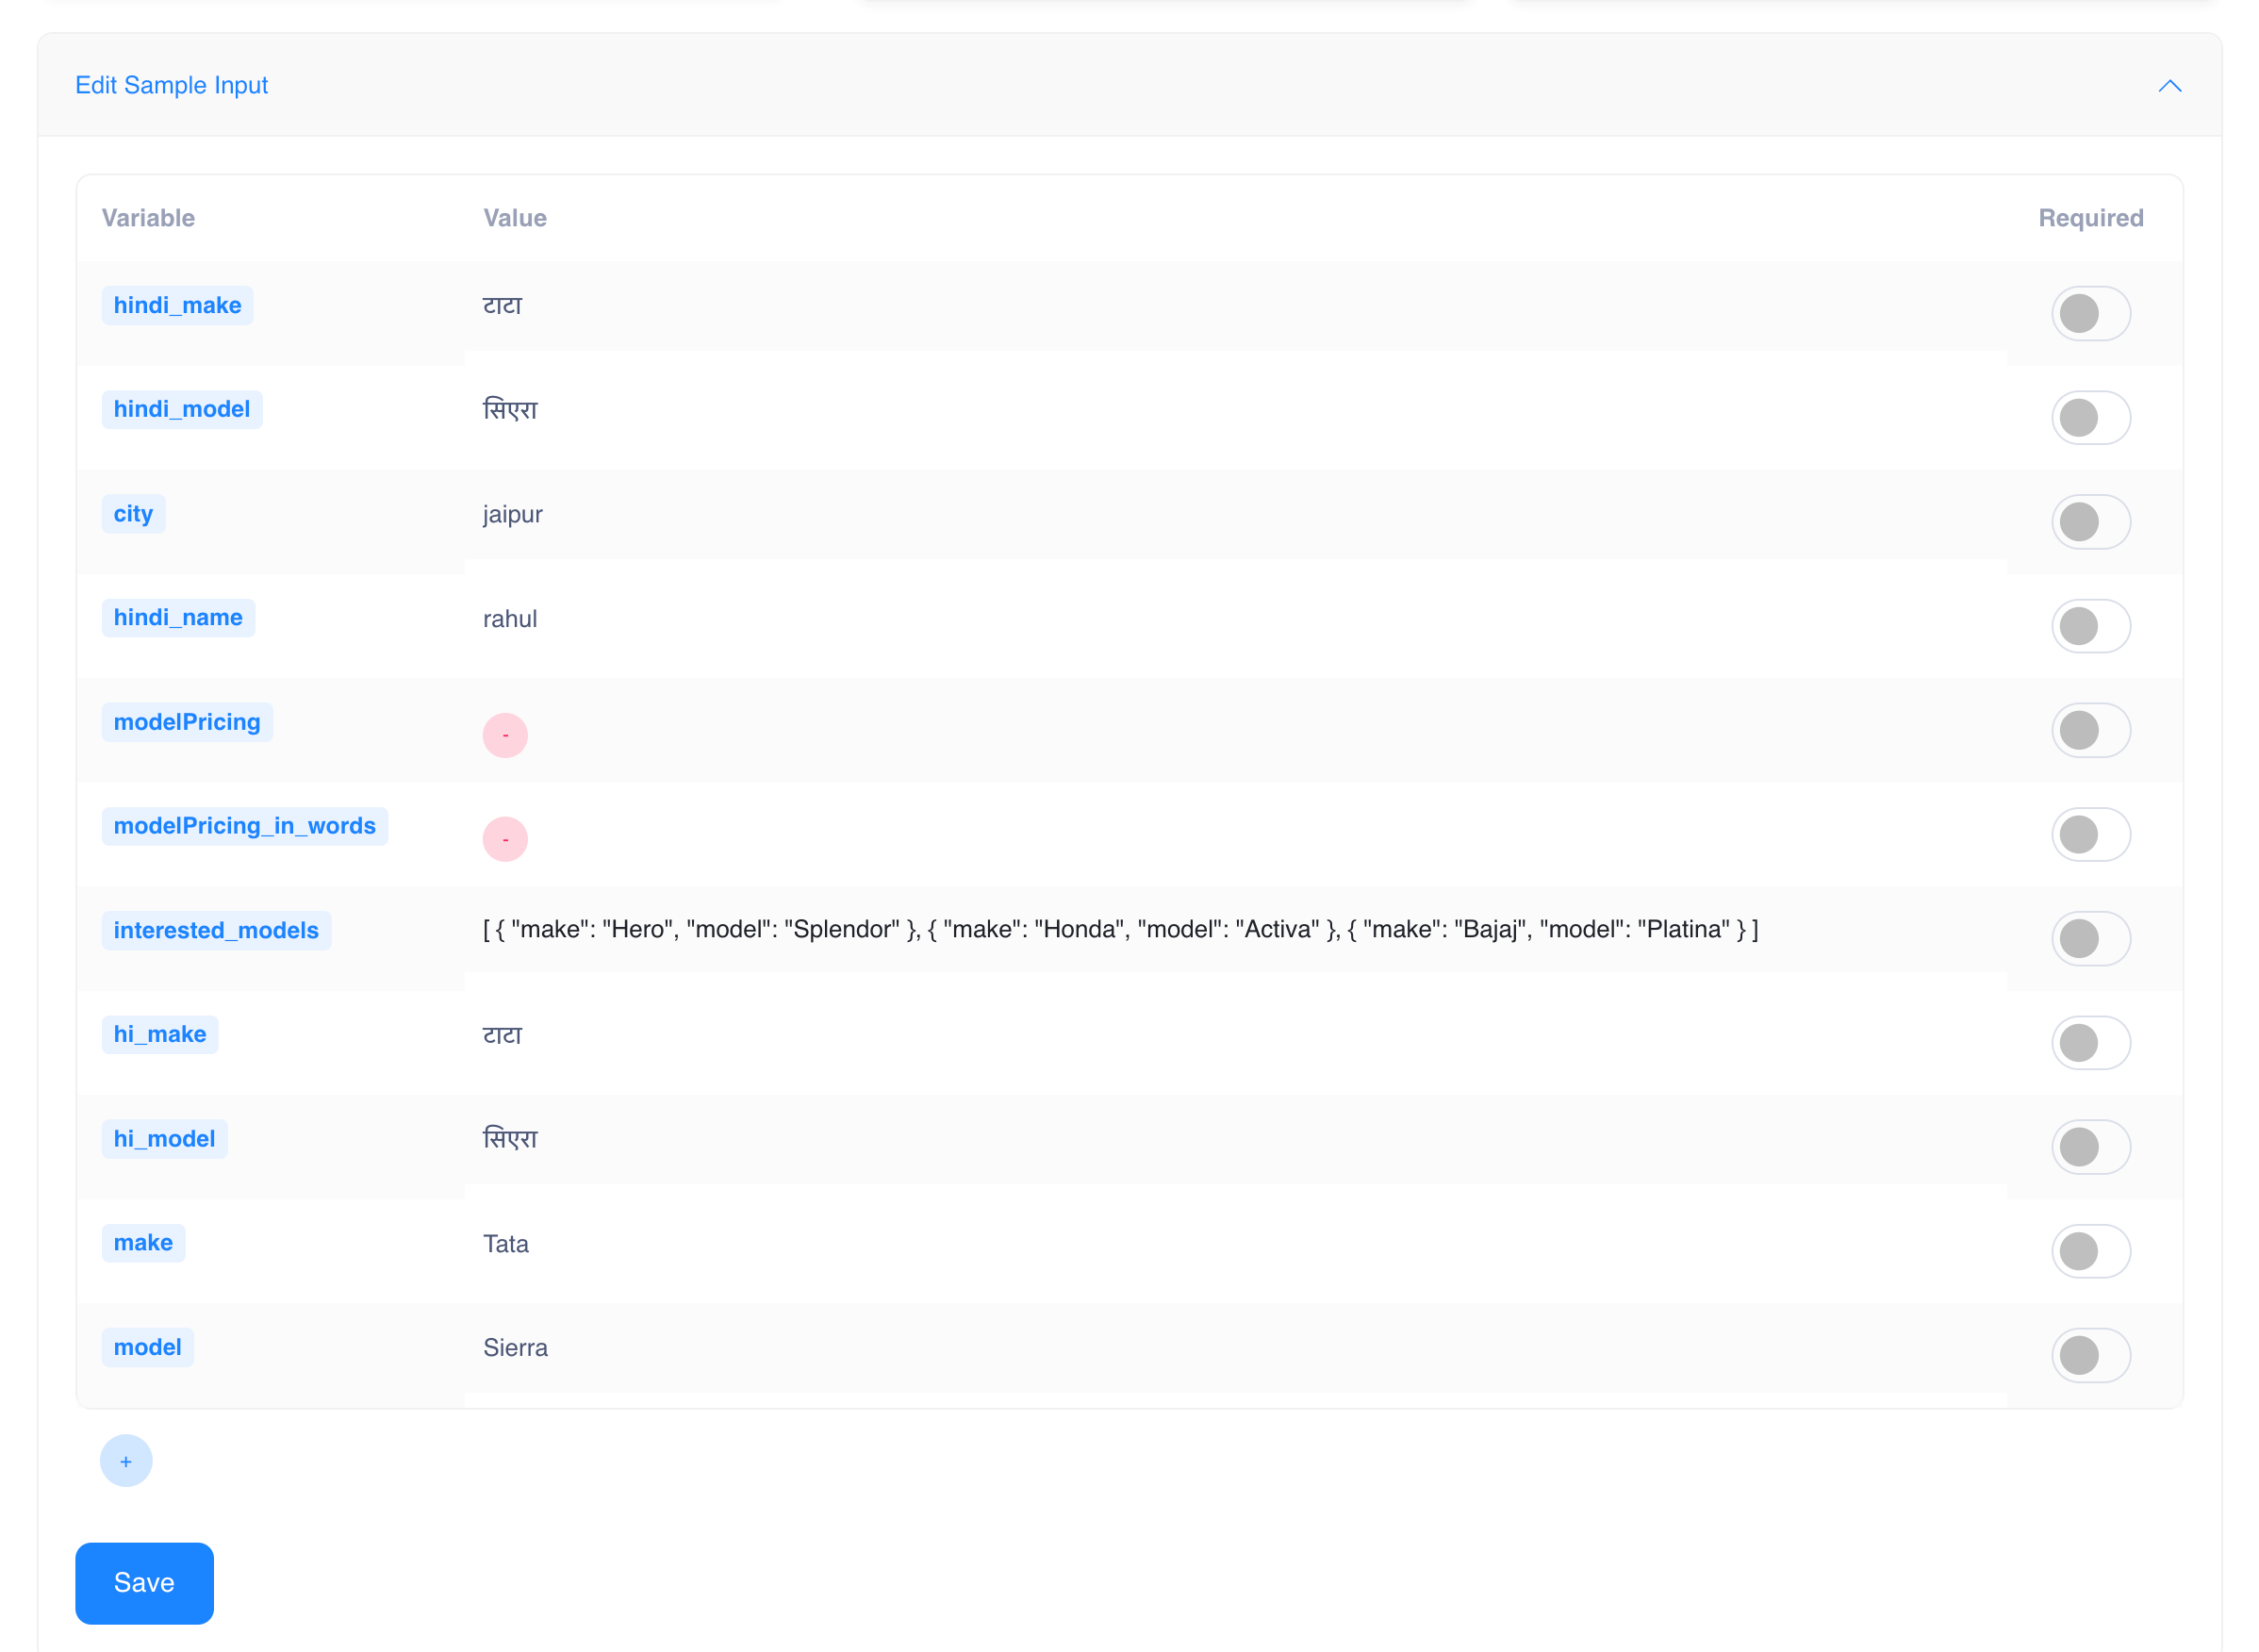
# Step 3: Configure Test Variables
Before starting a simulation, configure the variables that your prompt uses.
Scroll to the bottom and expand:
**Edit Sample Input**
You will see a list of variables currently configured for the agent.
Example:
| Variable | Value |
| :----------------- | :---------- |
| make | Tata |
| model | Sierra |
| city | Jaipur |
| hindi\_name | Rahul |
| interested\_models | JSON Object |
These values are injected into the prompt during simulation.
***
# Step 4: Edit Existing Variables
To test a different scenario:
Simply change the value of an existing variable.
### Example
Current:
```text theme={null}
make = Tata
model = Sierra
city = Jaipur
```
Scenario Change:
```text theme={null}
make = Hyundai
model = Creta
city = Delhi
```
Now when the simulation starts, the agent behaves as if the lead is interested in a Hyundai Creta from Delhi.
***
# Step 3: Configure Test Variables
Before starting a simulation, configure the variables that your prompt uses.
Scroll to the bottom and expand:
**Edit Sample Input**
You will see a list of variables currently configured for the agent.
Example:
| Variable | Value |
| :----------------- | :---------- |
| make | Tata |
| model | Sierra |
| city | Jaipur |
| hindi\_name | Rahul |
| interested\_models | JSON Object |
These values are injected into the prompt during simulation.
***
# Step 4: Edit Existing Variables
To test a different scenario:
Simply change the value of an existing variable.
### Example
Current:
```text theme={null}
make = Tata
model = Sierra
city = Jaipur
```
Scenario Change:
```text theme={null}
make = Hyundai
model = Creta
city = Delhi
```
Now when the simulation starts, the agent behaves as if the lead is interested in a Hyundai Creta from Delhi.
 ***
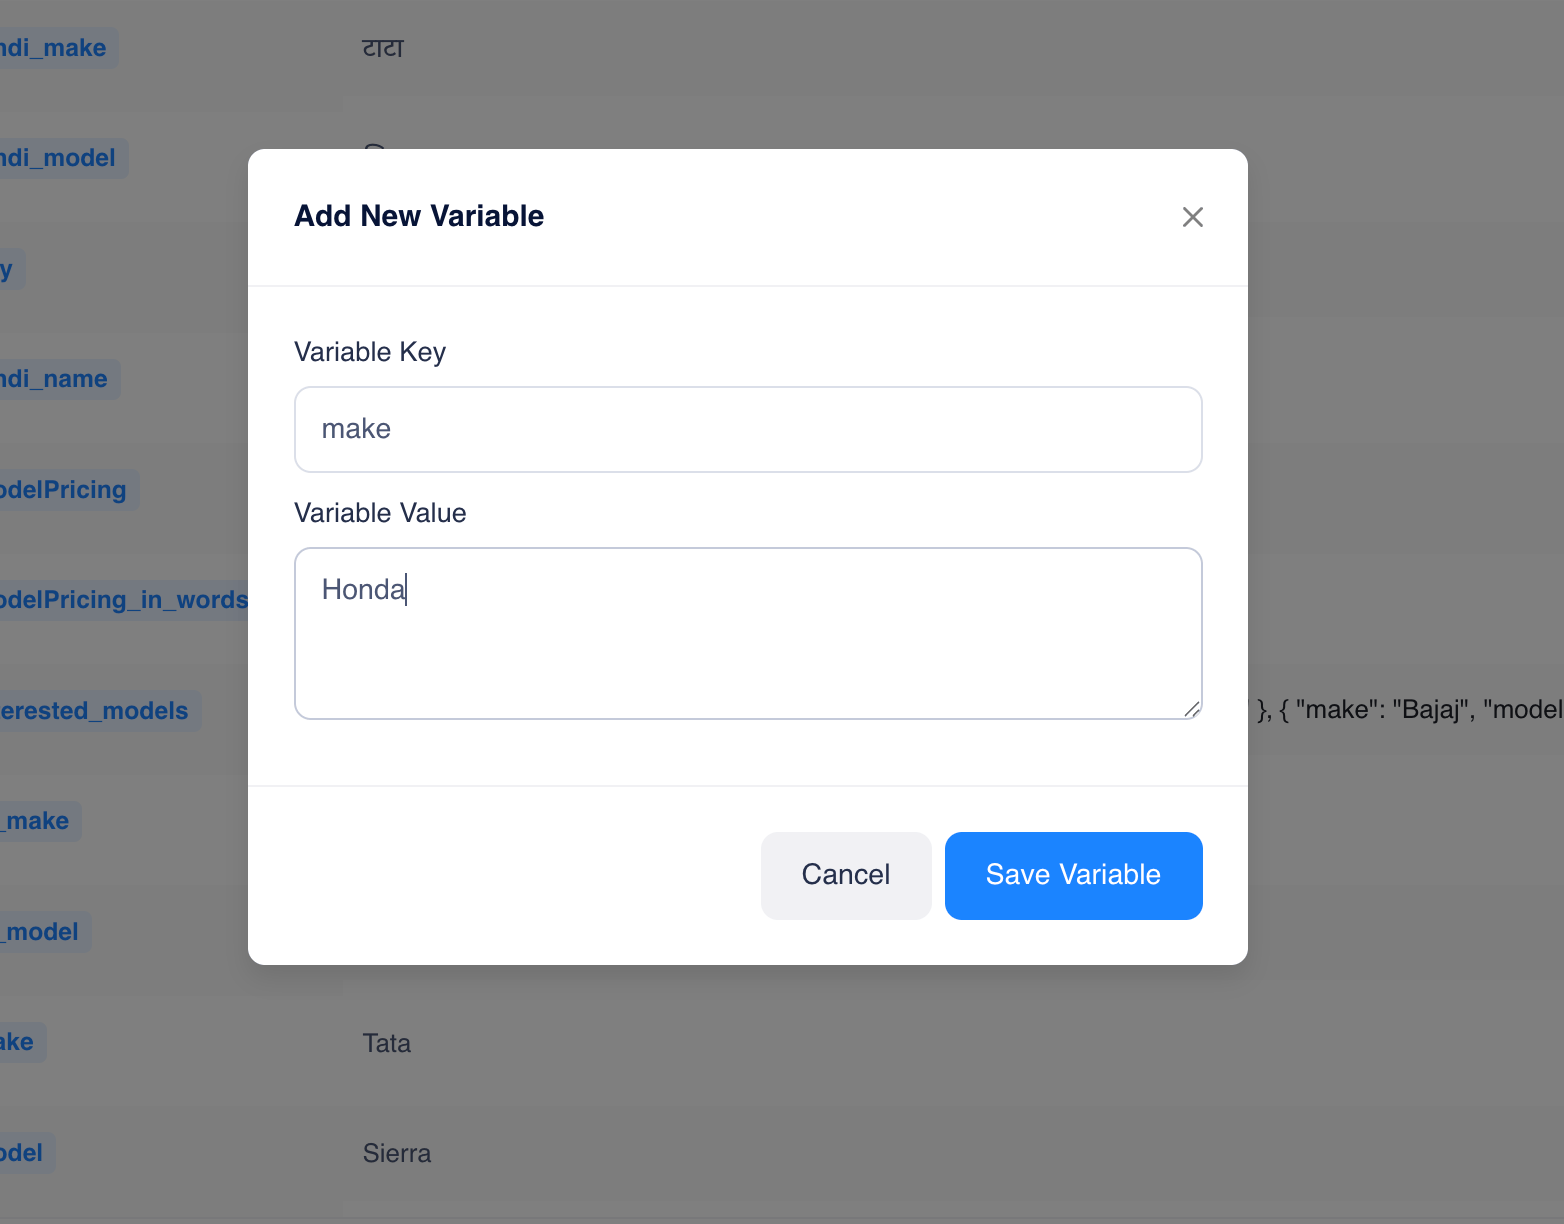
# Step 5: Add New Variables
If your prompt requires additional variables:
1. Click the **+** button at the bottom of the variable table.
2. The **Add New Variable** popup will appear.\\
Fill:
### Variable Key
Example:
```text theme={null}
customer_type
```
### Variable Value
Example:
```text theme={null}
first_time_buyer
```
Click:
**Save Variable**
***
# Step 5: Add New Variables
If your prompt requires additional variables:
1. Click the **+** button at the bottom of the variable table.
2. The **Add New Variable** popup will appear.\\
Fill:
### Variable Key
Example:
```text theme={null}
customer_type
```
### Variable Value
Example:
```text theme={null}
first_time_buyer
```
Click:
**Save Variable**
 The new variable is immediately available inside the simulation.
***
# Step 6: Supported Variable Types
Uservox supports:
### String
```text theme={null}
name = Rahul
```
### Number
```text theme={null}
income = 1200000
```
### Boolean
```text theme={null}
existing_customer = true
```
### JSON
```text theme={null}
{
"make": "Honda",
"model": "Activa"
}
```
### Array
```text theme={null}
[
{
"make": "Hero",
"model": "Splendor"
},
{
"make": "Honda",
"model": "Activa"
}
]
```
***
# Step 7: Save Variables
After updating variables:
Click **Save**
This stores the test configuration and makes it available for the next simulation run.
***
# Step 8: Start Simulation
1. Click the microphone button.
2. Start speaking to the agent.
3. Follow the conversation naturally.
4. Observe responses in the Conversation panel.
The agent will use the sample input variables as context throughout the interaction.
The new variable is immediately available inside the simulation.
***
# Step 6: Supported Variable Types
Uservox supports:
### String
```text theme={null}
name = Rahul
```
### Number
```text theme={null}
income = 1200000
```
### Boolean
```text theme={null}
existing_customer = true
```
### JSON
```text theme={null}
{
"make": "Honda",
"model": "Activa"
}
```
### Array
```text theme={null}
[
{
"make": "Hero",
"model": "Splendor"
},
{
"make": "Honda",
"model": "Activa"
}
]
```
***
# Step 7: Save Variables
After updating variables:
Click **Save**
This stores the test configuration and makes it available for the next simulation run.
***
# Step 8: Start Simulation
1. Click the microphone button.
2. Start speaking to the agent.
3. Follow the conversation naturally.
4. Observe responses in the Conversation panel.
The agent will use the sample input variables as context throughout the interaction.